Tuesday, August 17, 2010

Strange Brew

ginger beer9

In my high school microbiology class we made yogurt and wine (no, we weren't allowed to try the wine). Both were used to teach us about the wonders of microbes and fermentation. Without fermentation we wouldn't have wine, yogurt, soy sauce, beer or cheese. All things I wouldn't want to live without. Seriously, I've toyed with the idea of going vegan and the cheese thing is always the deal breaker. In short, fermentation is good.

I also like ginger. A lot. When I'm sick, I want ginger tea. I like sushi because it's an excuse to eat pickled ginger. If you were to bring me Ginger People ginger chews, I would be your new best friend. And if you ferment ginger with some sugar, water and lemon juice you get one of my favorite libations: ginger beer. If you like ginger, put down that ginger ale. Ginger beer makes ginger ale look like a mild mannered fuddy-duddy. It has a much more assertive ginger flavor, but retains a nice balance of sweetness and delicious, gingery heat.

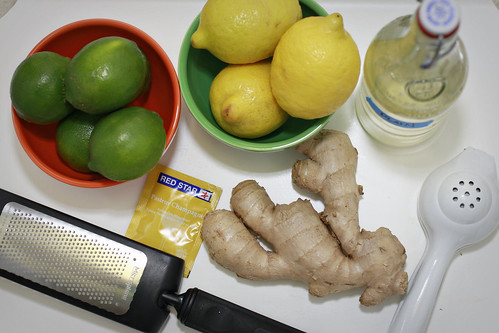
Yes, you can find ginger beer commercially (Bundaberg is my fave). But making it at home will be cheaper and you can do some customization with the flavor. Plus, it's like being back in Mrs. Wheeler's classroom. So throw on a lab coat and gather your materials. This recipe is a modified version of Jeffrey Morgenthaler's ginger beer. (The man is a mixology god, so definitely check out his site. His barrel aged cocktails are the new big thing).

ginger beer1

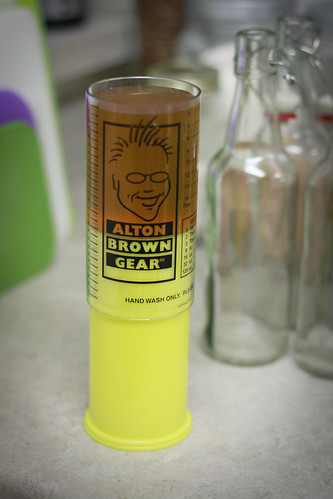
I picked up 16 ounce bail top bottles from my local homebrew supply shop. This recipe will fill one 16 ounce bottle.
1 ounce ginger juice
1.5 ounces lemon or lime juice
3.5 ounces simple syrup
10 ounces warm water
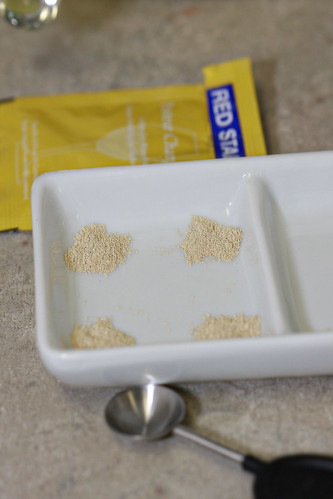
1/16 tsp champagne yeast

ginger beer2ginger beer3

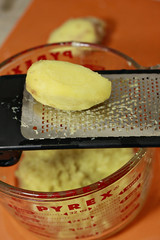
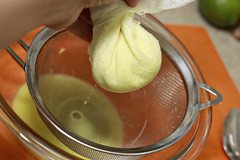
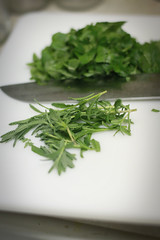
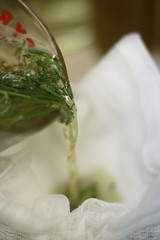
The most laborious part of this recipe is extracting the ginger juice. Just think of it as your arm workout for the day. Peel your ginger (just use the side of spoon to scrape off the skin). Using a microplane or the side of your cheese grater with the smallest slots, grate your ginger. Ginger is quite fibrous and this is where you'll get that workout. Put your grated ginger in cheesecloth, wringing it to extract as much juice as possible. For the 6 ounces of ginger juice I needed, I used the whole chunk of ginger pictured above. If you have juicer, extracting the ginger juice is, obviously, much easier.

ginger beer4

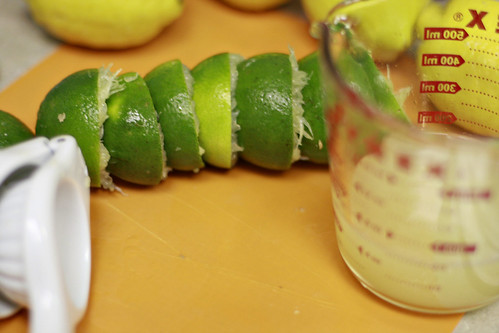
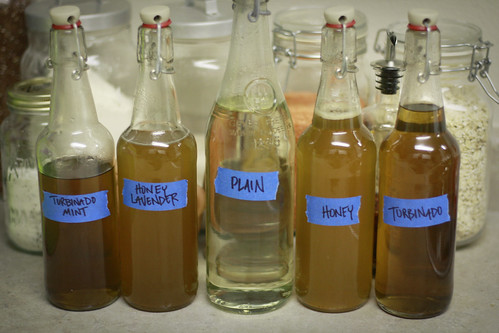
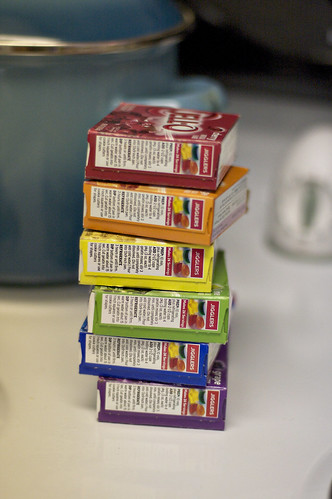
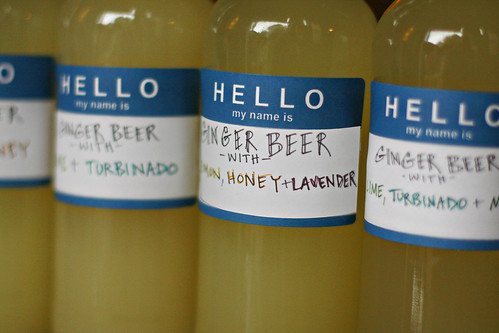
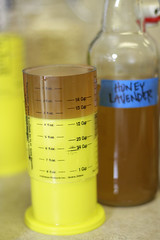
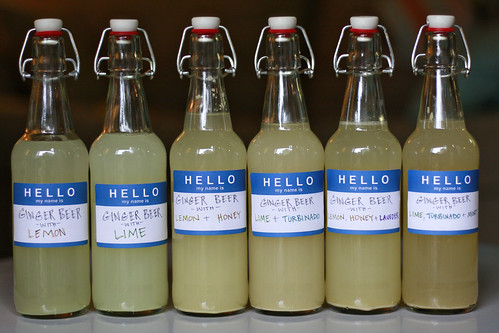
Juice your lemons or limes, making sure to strain out the pips and bits of pulp. Mix up a batch of simple syrup. In that last post, I made several different kinds of simple syrup. I then used those simple syrups to create different flavors of ginger beer. I made six bottles of ginger beer, using these variations.
1. Lemon juice and plain simple syrup
2. Lime juice and plain simple syrup
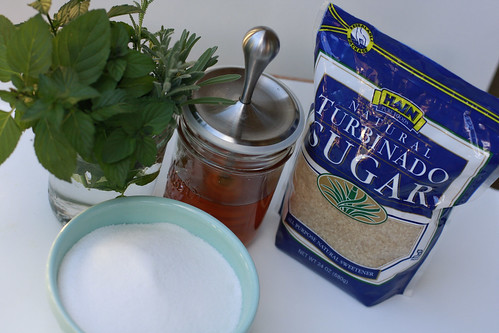
3. Lemon juice and honey syrup
4. Lime juice and turbinado syrup
5. Lemon juice and honey lavender syrup
6. Lime juice and turbinado mint syrup

ginger beer5ginger beer6

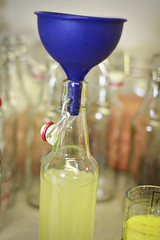
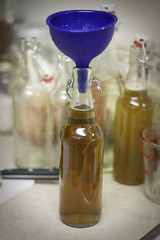
Pour the ginger juice, lemon or lime juice, simple syrup and water to your bottle, leaving a bit of head space. Now it's time for the yeast. I used champagne yeast this time (I found this at the local homebrew supply place). However, I have used regular bread yeast before and it worked just fine. In lieu of yeast, you could also try a wild starter or a ginger beer plant to begin the fermentation. Using yeast makes the fermentation a bit more predictable and speeds up the ginger beer making timeline. Add the yeast to your bottle, close the top and give it a gentle shake to mix.

ginger beer7

Now, find a dark, warmish place to store your bottle for about 48 hours. The first time I made homemade ginger beer, I just used a plastic two-liter bottle. This allowed me to tell when the brew had fermented enough (the bottle will get very hard). The fermentation happened much more quickly than I anticipated, and the bottle was firm after only 12 hours (probably because I used too much yeast that time). I wanted to use these more attractive bail top bottles this time, but I also didn't want exploding shards of glass. So I filled a small plastic water bottle with a sample of the ginger beer to give me an idea of how the fermentation was progressing. After 48 hours (or when your plastic bottle is firm), place your bottle(s) in the refrigerator to halt the fermentation process.

ginger beer8

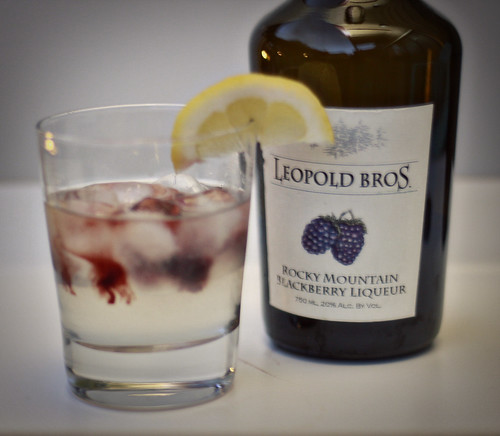
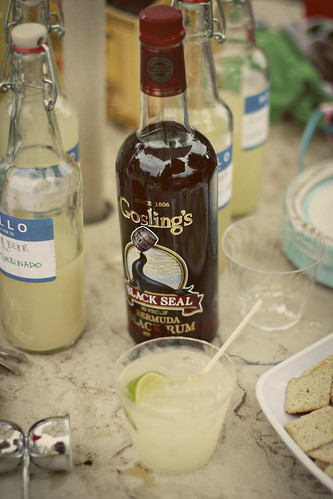
And now you have delicious, carbonated, spicy, sweet ginger beer! It's yummy on it's own (the fermentation does give it a slight alcohol content, so this is not a recipe for the kiddos). There are also a couple of classic cocktails you can make with ginger beer. So invite some friends over and mix up a Moscow Mule or a Dark 'n' Stormy! With all of the different variations we tried, ginger was rightly still the predominant flavor. The honey, turbinado, mint and lavender all just added a subtle background complexity. I found that the lemon and honey variations worked really well with the Moscow Mule. The version with lavender gave it a slight botanical note, which was pleasant. The Dark 'n' Stormy worked best with the lime and turbinado versions of the ginger beer. The molasses flavor of the turbinado complimented the dark rum and the mint gave it a subtle kick. The ginger beer will keep for a couple of weeks in the refrigerator.

ginger beer10

Oh, and when it started to rain on our ginger beer tasting/pool party, we went inside and watched 8: The Mormon Proposition. It's a fascinating (and timely) documentary, narrated by Dustin Lance Black. I recommend adding it to your must-see list.

Friday, August 13, 2010

Simple and Sweet

simple1

Simple syrup is...simple. Combine equal parts water and sugar, bring to a boil, simmah it down for a couple of minutes and voilà! It's endlessly useful stuff. You can use it in cocktails, to keep the layers of your layer cake moist, or to sweeten your iced tea without a bunch of stirring. You can even dilute it a bit and use it in a hummingbird feeder (they prefer one part sugar to four parts water).*

It's so simple, that it practically screams to be tinkered with. I like mint in my iced tea, so why not just add mint to the simple syrup? For a homemade vanilla latte, steep a couple of vanilla beans in that simple syrup. Maybe you're cutting back on refined sugar, so you might use turbinado or moscovado sugar instead. Now you have a simple syrup that has a nice, deep molasses flavor. Or substitute honey, for a syrup that tastes like, well, honey.

I have a little project in mind for this simple syrup, so I was thinking of some specific flavor profiles. I made one plain batch, one with honey, one with turbinado, one with honey and lavender, and one with mint and turbinado. Again, I just used equal parts of either sugar, turbinado or honey and water. Once it comes to a boil, turn down the heat and let is simmer for a minute or two.

simple2

For the version with mint, I used 1 cup each of turbinado sugar and water and 1 cup of loosely packed mint leaves. Once the simple syrup had simmered I took it off the heat and added the roughly chopped mint. After letting it steep for about 10 minutes, I poured the mixture through a strainer lined with cheesecloth. The process was the same for the honey lavender version, though I used less lavender, because a little lavender goes a long way.

simple3simple10


simple6


simple6
simple5 Use a funnel and bottle your syrup after it's cooled a bit. (I'm an impatient girl, and was almost burned by molten sugar syrup splashing out of the funnel. So do let it cool down). I used these bail top bottles, but any sanitized glass or plastic bottle will do. Refrigerate your simple syrup and it will keep for a few weeks. If you're making more than one type of syrup, labeling it may be helpful.

simple7


I do have big plans for these different syrups. But, in the meantime, I couldn't resist mixing up a cocktail with a bit of the plain syrup. The Bramble has been one of my go-to drinks this summer. Salud!

simple8

*UPDATE: One of my very clever friends also noted that using 1 part simple syrup and 2 parts lemon and/or lime juice results in a homemade sweet and sour mix that is 10 times better than the noxious neon yellow stuff!

Sunday, August 8, 2010

Cup O' Succulents

succulent2

Confession: I used to be a serial plant killer. I'm sure there is a "wanted" poster with my mug on it in some garden center. While my thumb has gotten a bit greener over the past few years, I still appreciate a plant that requires little care. At the top of my easy-to-care-for list are succulents and mosses. Let's focus on succulents. There are thousands and thousands of varieties of succulent. Their foliage can be green red, silver, yellow, purple and even variegated. Many also have beautiful blooms. Most of them store water in their leaves, giving them a plump look and often an architectural quality. Their ability to store water make these plants very drought resistant. Some do best in warm climates and others (ice plants) tolerate much colder weather. Some of the most popular succulents for gardening come from the sedum genus. You've likely seen them around, in your grandmother's garden or kickin' it as groundcover. The plant above is Sedum Globosum, commonly called "Old Man's Bones" because it's foliage looks like ball joints (though it's missing some foliage after being attacked by birds). One of my favorite succulents is the Mesa Verde Ice Plant which was discovered as a spontaneous mutation at the Denver Botanic Gardens! Oh, and then there are the lithops, which are just crazy cool and spectacularly weird.

succulent1

Succulents are so cool that we seem to be in the midst of a succulent craze. There are great examples, all over the web, of fun things to do with succulents. If you are in California, and starting to plan a wedding now that Prop 8 has been overturned, check out Flora Grubb Gardens in San Francisco. They do the most amazing succulent bouquets and boutonnières, which are much more eco-friendly than cut flowers!

Succulents make great container plants. And there is no reason not to get creative with the type of container you choose. I am a big fan of recycling found objects for this purpose. Currently, I'm using a paint can, an enamel bowl, a flour sifter, a colander, a teacup and a latte mug to house various plants. The big thing to remember when choosing a container is that you need drainage. Succulents, in particular, don't like soggy roots. It's necessary to pot them in a sandy, well draining soil. If your container has built in drainage holes (e.g. colander, flour sifter), you're set! If it's something like a paint can or enamel bowl, you can just use a hammer and nail to create some holes.

succulent4


succulent6

If you want to create drainage holes in a ceramic cup or bowl, a hammer and nail isn't going to work. Instead, grab a drill and a bit with a carbide or diamond tip that is made for ceramic and glass. The first step is to find a mug, teacup or bowl lying around your house. If you can't bear to bore a hole in your Smith College Alumnae Association mug, look for something at a thrift store or yard sale. I chose a 3/8" bit, but if your container is large, you may want to choose a larger bit or just drill multiple holes. Flip your cup over and place a dish towel underneath to provide a little cushion and to ensure that your teacup stays in place while you are drilling. It's sometimes handy to take a nail and scratch an x at the spot where you are going to drill. This gives your drill bit a place to grip instead of skipping around.

succulent7


It's also important to keep the area you are drilling flooded with water. This keeps the bit from overheating and provides a lubricant so that your bit doesn't get worn out. Time to grab a buddy and ask them to dribble water while you drill. Or, if you are lucky, your cup or mug will have a bit of a well on the bottom that will hold some water. If that's not the case, get some putty or play-doh and channel you're inner first grader. Roll out a worm shape and then create a moat around your drill site, pressing it down so that the seal is water-tight. Now move your dog out of the way and drill!

succulent9


succulent10

Once you have your drainage hole drilled, procure soil made for succulents or cacti (or mix your own) and pot your plant! Succulents are very hardy and tough to kill; the one big no-no is overwatering. Only water when the soil is quite dry. As I mentioned above, there are many varieties to choose from, just make sure to pick one that will work for your climate. Check out your local nurseries for ideas. But, there is one more, totally awesome thing about succulents. They are really, really easy to propagate.

Some varieties create offshoots or pups (you can see some in my "hen and chicks" plant below), that are simple to uproot and replant. For the rest, simply snip or pinch off a stem or two, and place your cutting in a protected place for a couple of days. The end you've cut will dry out and scab over. At this point you can dip the end in a bit of rooting hormone, though I've never found this necessary. Now, plant your cutting. It should take root and start to grow within a couple of weeks. I've purchased some of my succulents from a local nursery, but others I've purloined from friends and grandma. Trading cuttings with friends in your area also ensures that you have varieties which will thrive in your climate.

Speaking of swapping succulents, does anyone have a String of Pearls plant? Let's trade!

succulent3

Friday, August 6, 2010

Jell-Oh!


rainbow jello

Most gay pride events take place in June. But just like independent movies and fashion trends that don't involve fleece, gay pride takes a little longer to make its way to Colorado Springs. So, in late July, we found ourselves planning a pre-pride brunch. On the menu were chocolate chip pancakes and breakfast pizza (yums). But this celebration needed a little rainbow kick. The idea of turning on the oven in 97 degree weather was unbearable, so the original plan for rainbow cupcakes was nixed.

Which was fine, because I had Jell-O on the brain. Whether it is jelly, gelatin, Jell-O or aspic, it has been wobbling back into the cultural/culinary zeitgeist. Part kitsch and part chemistry, it is the ultimate food you're allowed to play with. And, holy moly, people are doing some amazing stuff with gelatin. If you've never seen the work of Bompas & Parr, then you're in for a jiggly treat. And let's marvel at this year's Gowanus Studio Space Jell-O Mold Competition. I'm sort of in love with the Jell-O-ware idea. Also, their "Keep Calm and Wobble On" poster might be the best spoof I've seen of the ubiquitous "Keep Calm" design.


Which brings us to rainbow Jell-O. Let's face it, you don't need to be CIA (no, the other one) trained to make Jell-O; but there are a couple of ways to go about making rainbow gelatin. Because Jell-O is semi-transparent, you could just layer red, green and blue gelatin to make a rainbow (science!). I wanted each color to be really distinct (also, bright and vivid), so I chose to use six different colors/flavors and add opaque layers. 

jello boxes

1. Mix up your first color/flavor of Jell-O according to package directions and pour approximately half of the mixture into your choice of vessel(s). Refrigerate.

2. While the previous layer is setting up, add a couple of tablespoons of condensed milk to the remaining half of the mixture. Once your translucent layer is mostly firm, add your opaque layer, making sure the mixture is cooled to room temp. Refrigerate.

3. Repeat steps 2 and 3. Over and over and over (you could even make a double rainbow, intense). I chose to start and end with translucent layers. 

This isn't hard but it is time consuming. Oh, and because this was a grown-up gathering, I did add a little bit of vodka to the berry flavors and a bit of gin to the citrus flavors. I didn't want these to be huge Jell-O shots, so there was only the equivalent of a shot in each 10 oz cup.

rainbow jello       jello model

I think Bill Cosby would approve.

Potpourri for $500, Alex.

This space will be a bit like the potpourri category on Jeopardy. A little diy, a little geeky, a little crafty, and a little foodie. I considered calling this blog "Hungry and Witty and Gay," because my food projects tend to be more elaborate than my craft projects. And my crafty projects tend to be edible. Another blog name possibility was 'Misspent Adulthood," because this blog will be used as justification for the inordinate amount of time spent on these projects. Some of the projects turn out just as I'd imagined, and some...not so much. Hopefully, documenting the successes and disasters will help to even out the ratio a bit.

Oh, and if it turns out that just my mom reads this blog (hi, mom!), that is totally okay.  

And now, a little Maria, who is feeling....well, you know.