Saturday, April 30, 2011

That Sucks

litho5 copy

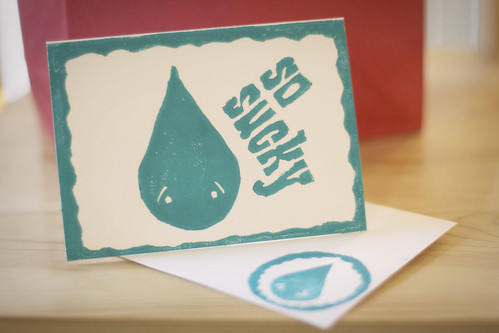
Breakups suck. I generally don't believe in universal truths, but the inherent suckiness of breakups might be something about which all human beings can agree. Heck, they suck even if you aren't involved in the relationship that is ending. It is particularly crummy when you have good friends breaking up with each other because you can't indulge in the ceremonial and cathartic verbal-bashing of the ex. And so we talk about how we feel and drink. And talk. And drink. And at some point, all of my comforting words begin to sound trite. Sure, it might be for the best. And it would be healthy to take some time to focus on yourself. But really, at the end of the day, it just sucks.* And there is no card in the grocery store that conveys this properly. So clearly the solution is to make your own.

litho1
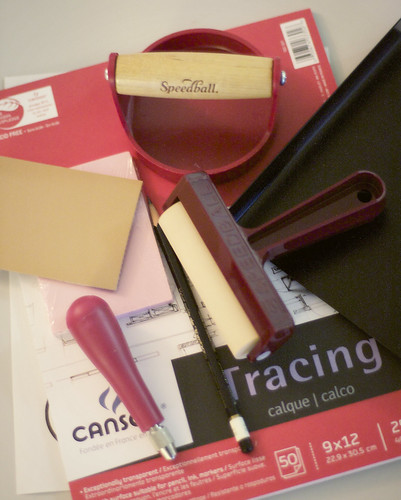
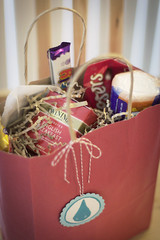
Clockwise from top: barren, inking plate, brayer, soft pencil,
linoleum cutter and linoleum blocks sitting on a pad of tracing paper.
Now the last time I made a linoleum block print I was probably wearing braces. To my delight, I discovered that there are other types of lino blocks besides that hard, dark gray linoleum we were stuck with in school. That stuff is difficult to carve and increases the chances of gouging, stabbing or otherwise maiming yourself. I tried Speedball's Speedy-Cut and Speedy-Carve and preferred the Speedy-Cut (I'm linking to Dick Blick because they often have great online deals and ship nationally, but also check out your favorite local art supply store).

Supplies you'll need:
Linoleum block
Linoleum cutter (getting multiple sized/shaped blades is helpful)
Water based block printing ink
Brayer
Inking plate
Baren or spoon
Soft pencil
Tracing paper (unless you are drawing your design directly on the linoleum)
Blank cards and envelopes

litho2

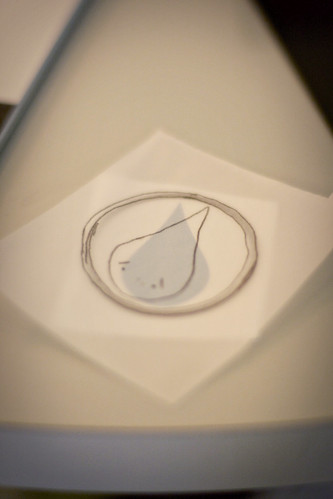
I'm really crappy at drawing so I created my design in Photoshop and kept it simple. That little guy is supposed to be a sad raindrop but I realize it looks like a tear. Sigh. Create a computer based or hand-drawn mock up of your design. If you aren't using letters and you are a better artist than I am, feel free to draw your design directly onto the linoleum. Just remember that everything will be reversed when it's printed, making any lettering pretty tricky (if you can freehand draw backward letters, you might be a robot). Otherwise, trace your design onto the tracing paper with a soft pencil. Now turn the paper over and place it on your lino block. Trace over the design again to transfer the image to the linoleum.

litho3 copy

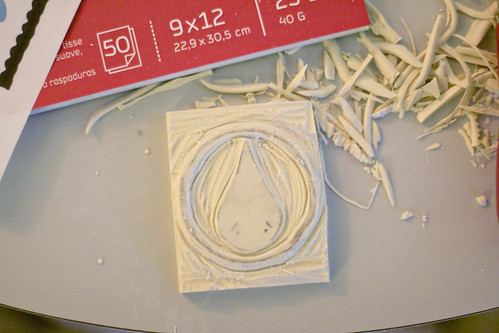
Use your linoleum cutter to carve out your design. Remember that you are carving away the areas that will be negative space. Using a narrow blade for detail work and a wider blade to carve away larger spaces is the way to go!

litho4

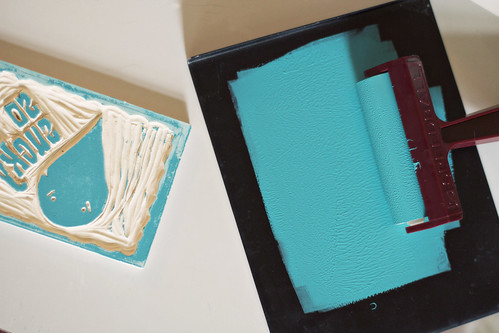
Squeeze a good tablespoon of ink onto the inking plate. Roll the brayer through the ink in different directions until you have even coverage on your brayer. Roll the brayer over the block (again it's sometimes helpful to roll over it in different directions) to fully cover the positive areas. Carefully place your card on top of your inked lino. Using a barren or the back of a spoon, rub the paper with even pressure to transfer the ink to the card. Gently peel the card stock away from the lino. If you've used bit too much ink, some smudging may occur. No worries, just try it again or embrace the smudges as tell-tale signs of your DIY awesomeness.

litho6litho7

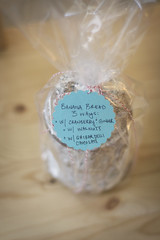
You should also give your friend a gift along with that awesome custom card. Something to help combat the the epic suckitude of a breakup. May I suggest baked goods? I find banana bread comforting and it's easy to jazz it up with a few additions. Use mini loaf or bundt pans, and create as many variations as you'd like! Or maybe gift a selection of treats from across the pond to accompany a marathon of deliciously trashy British lezzer television? Come on, you know baked goods and cute girls with accents make everything better.


*Are you offended by the number of times I've used variations of "that sucks" in this post? Don't be. It's the "most sincere expression of sympathy" amongst modern idioms.

Sunday, April 24, 2011

Today I made...

carrot cake cupcakes
Carrot Cake Cupcakes! (vegan version on the left)

I made two batches of carrot cake, one using this recipe and the other using the same recipe with modifications to make it vegan/healthier. For the vegan version I used "flax eggs" and coconut milk instead of the eggs and buttermilk. I also swapped out half of the AP flour for whole wheat, used applesauce in place of the oil, 1 cup of brown sugar instead of white sugar and dried raw coconut instead of the sweetened flake variety. For the vegan "cream cheese" frosting I used Tofutti Better than Cream Cheese and flavored it with maple syrup, cardamom and nutmeg. We'll see which one the fam prefers!

spinach strata
Spinach strata with feta, lemon, oregano and thyme

I've been obsessed with Heidi Swanson's new cookbook, Super Natural Every Day, and I can't wait to dig into this spinach strata from the book! This recipe, printed in Food & Wine, is the same as the book version except it calls for additional tablespoon of olive oil and 2 more ounces of spinach. I also threw in some lemon thyme with the oregano.

cupcake face plant Update: The verdict is in and the vegan cupcakes won! Most people thought the vegan version was more moist and appreciated that the frosting wasn't cloyingly sweet. The regular cream cheese frosting recipe calls for 2-4 cups of confectioners' sugar and for the vegan version I just used a couple of tablespoons of maple syrup. They were so good, they might make you want to do a face plant right into the cupcake!

When I'm feeling a bit grumpypants, cupcakes are a surefire way to make me feel better. But apparently cupcakes aren't enough to cheer you up when you've just woken from a nap and are disappointed that rain is postponing an Easter egg hunt. So the aren't magic, but they are pretty darn tasty!

cupcake pout

Monday, April 4, 2011

To Dye For

Easter Egg Project

This is the perfect post to mark my attempt to resurrect this blog. According to Wikipedia, the "egg is a pagan symbol of the rebirth of the Earth in celebrations of spring and was adopted by early Christians as a symbol of the resurrection of Jesus." Whatever your reason might be to start boiling up some eggs (Easter, Passover, some curried egg salad), why not make them a bit festive (apparently we really like a little color in our food). Yes, you could go the easy route and just dump fake dye in a cup with some vinegar and hot water. But why not get a little mad scientist and play around with some natural dye options? You probably have a few things in your refrigerator or cupboard right now that would work! And just look at those gorgeous colors--so much prettier than Red Dye No. 3 (which always reminds me of this song).

You'll need:
Hard Boiled Eggs
Vinegar
Alum Powder (optional)
Oil (optional)
Natural dye matter (red cabbage, blueberries, turmeric, spinach, beets and onion skins are popular options)

First, the eggs. I used both white and brown which produced slightly different results based on the dye! You probably know how to hard boil an egg, but here are some directions anyway. To ensure that your eggs are easy to peel, you could use older (but not out of date) eggs or steam them!

Easter Egg Project          Easter Egg Project


Easter Egg Project Now it's time to scour your cupboards and the produce section for some natural dyes! For my eggs, I used raspberry zinger tea, turmeric, beets, blueberries, red cabbage and red onion skins (I just raided the onion bin at the grocery store for extra skins). You could also try spinach, grape juice, pomegranate juice, cranberries, red wine, etc. Basically, if you've ever stained your clothes with something it will probably work as a natural dye.

To prepare the dye, chop (e.g. cabbage) or shred (e.g. beets) any of the larger produce. Fill a pot with enough water to cover the eggs you plan to dye and add your dye matter, plus a tablespoon of vinegar. Boil for 15-20 minutes or until you've achieved a deep, rich color. Strain and let your dye cool to room temperature.

Easter Egg Project
Dyes, left to right: beet dye, turmeric dye, red cabbage dye, raspberry zinger tea dye, blueberry dye.
Find some sealable containers, add your hard boiled eggs and fill with your dye. At this point I also added 1/2 tsp of alum powder which is supposed to make the colors a bit brighter. I think it ended up producing a mottled effect on some of the eggs (which I sort of liked). I probably should have added it when the dye was still warm and stirred it in a bit more thoroughly! I also experimented a bit by combining two different dyes (blueberry dye + turmeric dye = lavender eggs). Now stick your containers in the fridge and let them sit overnight.

Easter Egg Project

Easter Egg Project
Clockwise from top right: beets (white egg), red cabbage, blueberries+turmeric, turmeric (white egg), turmeric (brown egg), beets (brown egg), beets (brown egg), turmeric (brown egg), red onion skins, red cabbage, beets (white egg), blueberries. 
If the colors aren't quite where you would like them you can let them sit a bit longer. Otherwise, pull them out and let the eggs dry in an egg carton or on paper towels. Once the eggs are dry you can drizzle some oil onto a paper towel and buff the eggs to give them a bit of gloss.
And now you have naturally dyed eggs! Marvel at their beauty...and then destroy them to make some yummy deviled eggs or ridiculously good egg salad.

Easter Egg Project